

Another Look: 3 design tips for simple & fast scrapbook pages
Did you ever wish there was a secret formula for scrapbooking? Or a way to power through an album quickly, but still have beautiful pages? Once you learn these 3 tips, you will have a simple and easy strategy for creating scrapbook pages quickly and beautifully. Yes, you will need to practice, but I am here to cheer for you and give you inspiration! YAY YOOOOOU! Follow along as I create my 2-page scrapbook layout, and show you step-by-step how easy it is to use these tips.
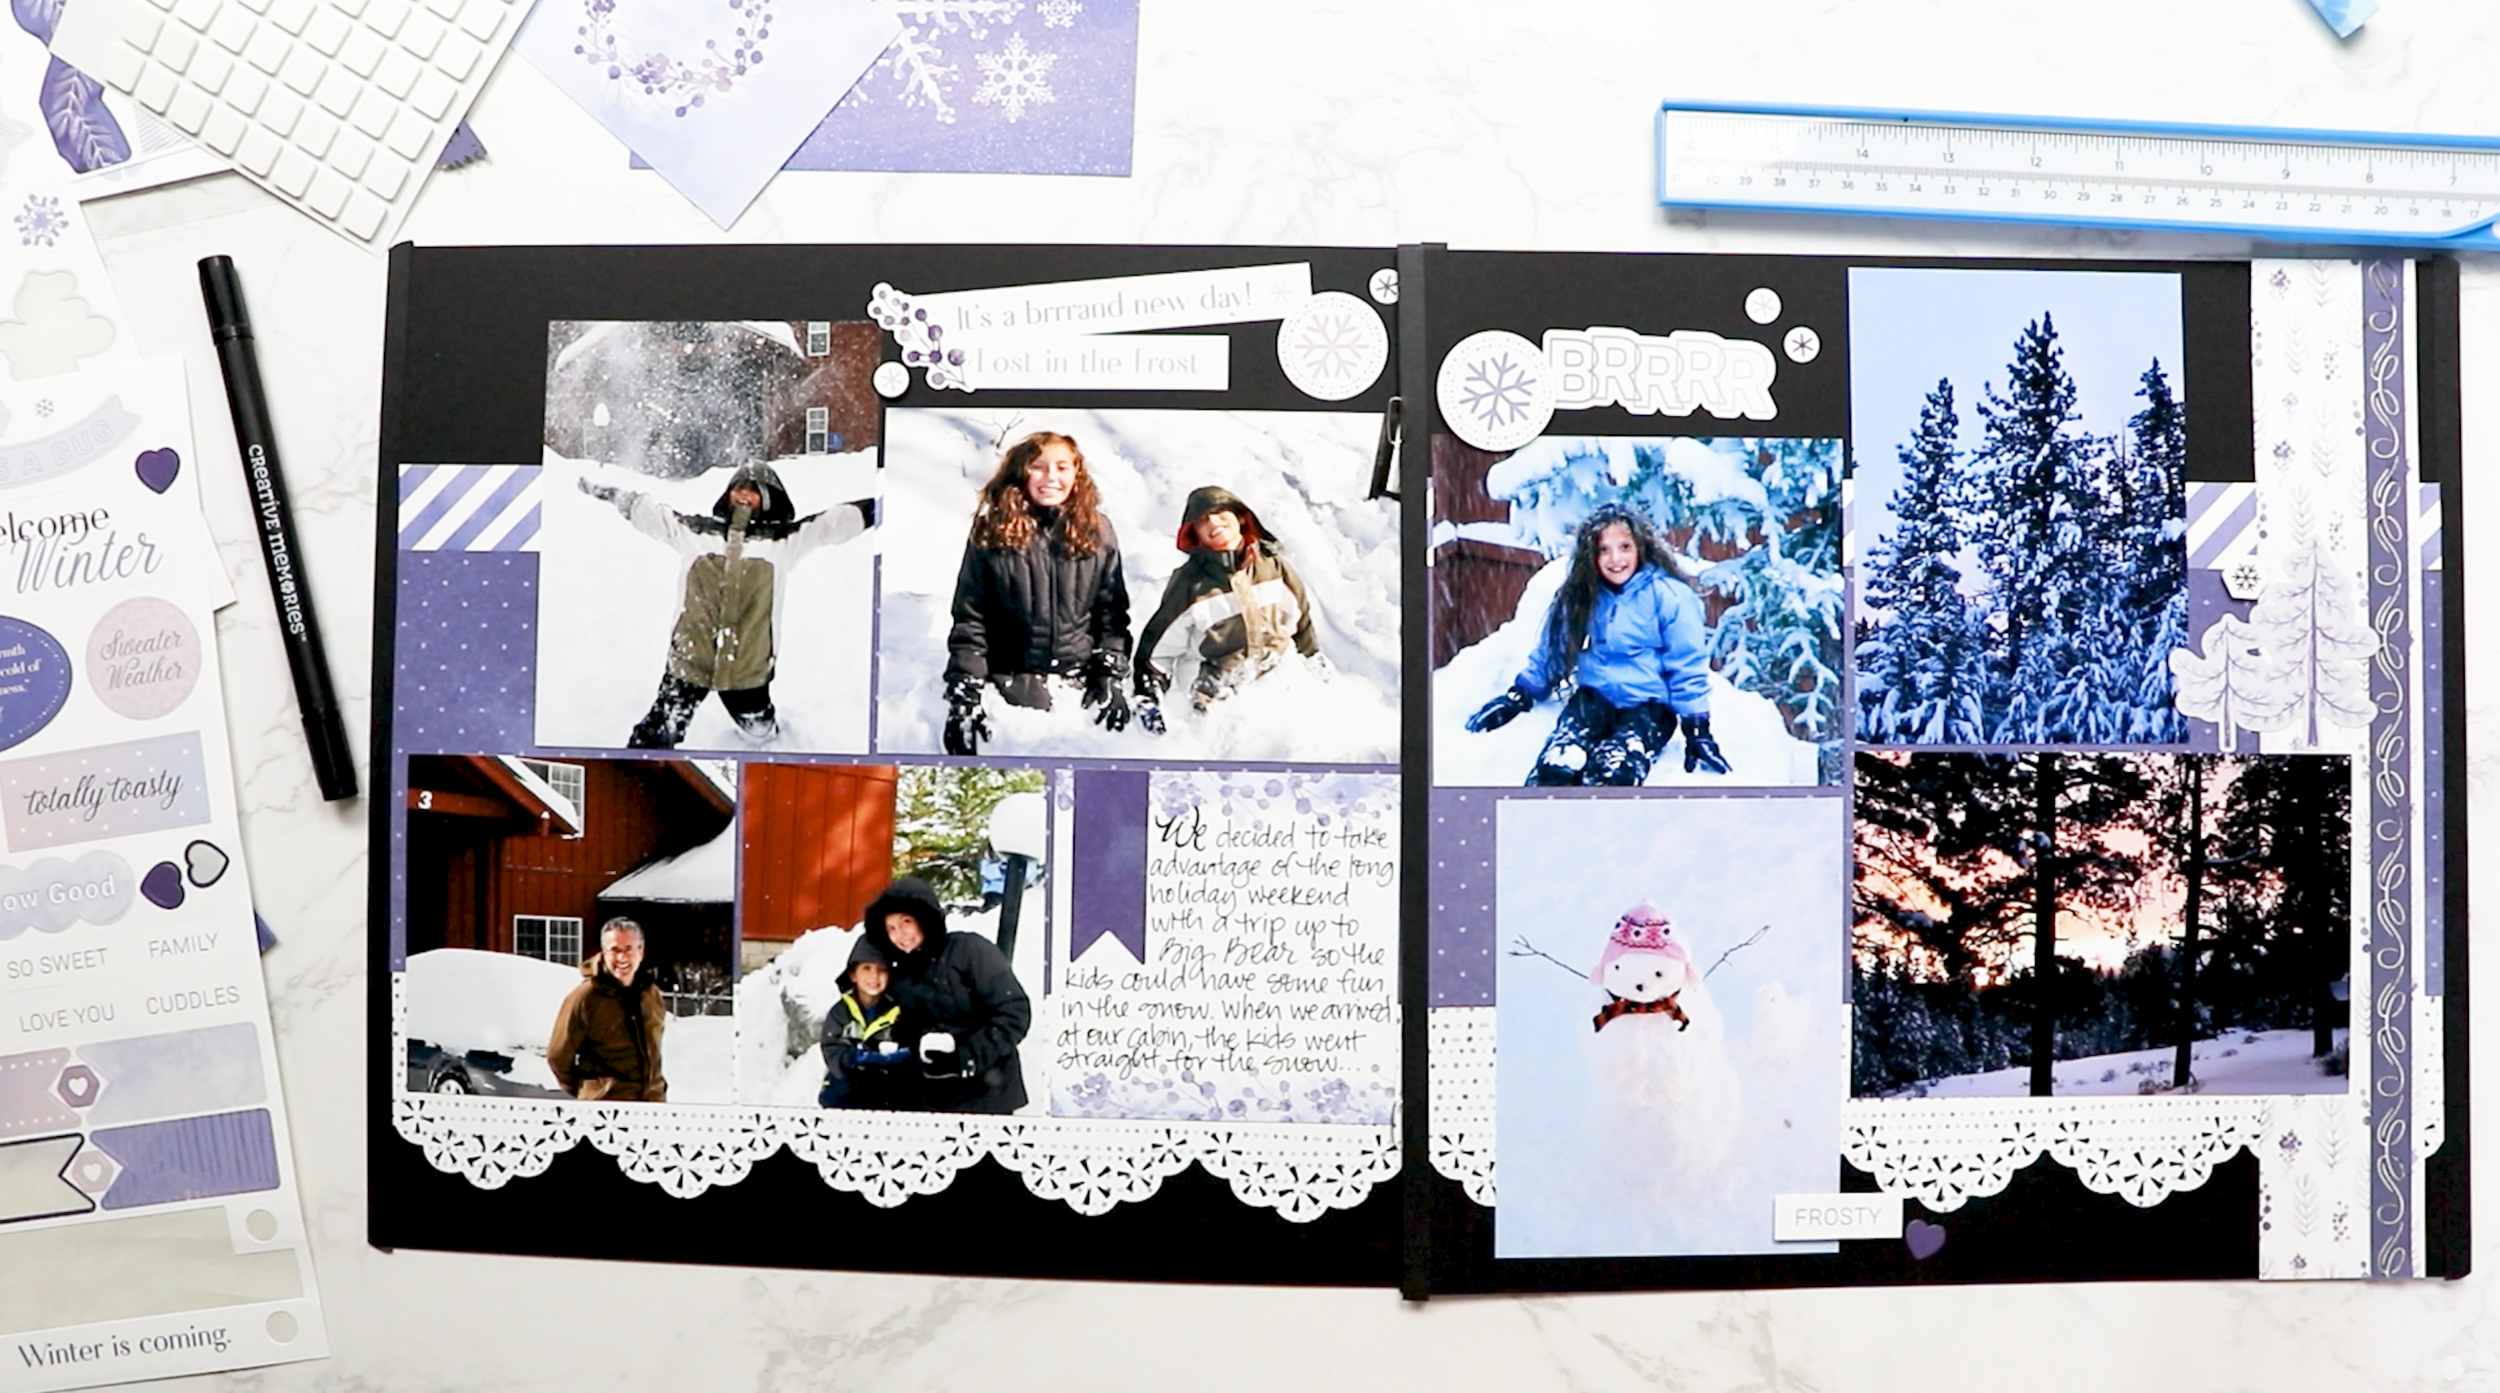
The supplies I used for this layout are from Creative Memories WINTERBERRY collection, available on my website here. To see me create these pages in action, you can watch my video or check out this post on the Creative Memories Blog!
Tip #1: Color Blocking

As you may know by now, I love highlighting the photos on my page (they are the star!), and using large blocks of solid and printed paper adds color and pattern to my pages, and helps focus the attention on my photos. There are so many different combinations of sizes and ways of layering with the horizontal and vertical blocks to make your page interesting. These strips can vary in size, but use the full 12” length of paper. A quick tip: Cut your paper 1/2” larger than your photo, and you have an instant mat of color!
On this layout I cut a 12x12 paper from the Winterberry collection into a 6.5” strip and a 5.5” strip, and adhered them vertically in the center of the 2 page spread. Black scrapbook pages are a favorite of mine, and I love the way the colors of this collection just pop against them.
Adding decorative border strips, die cut strips, punch borders and sticker strips creates layers and interest to your layout.
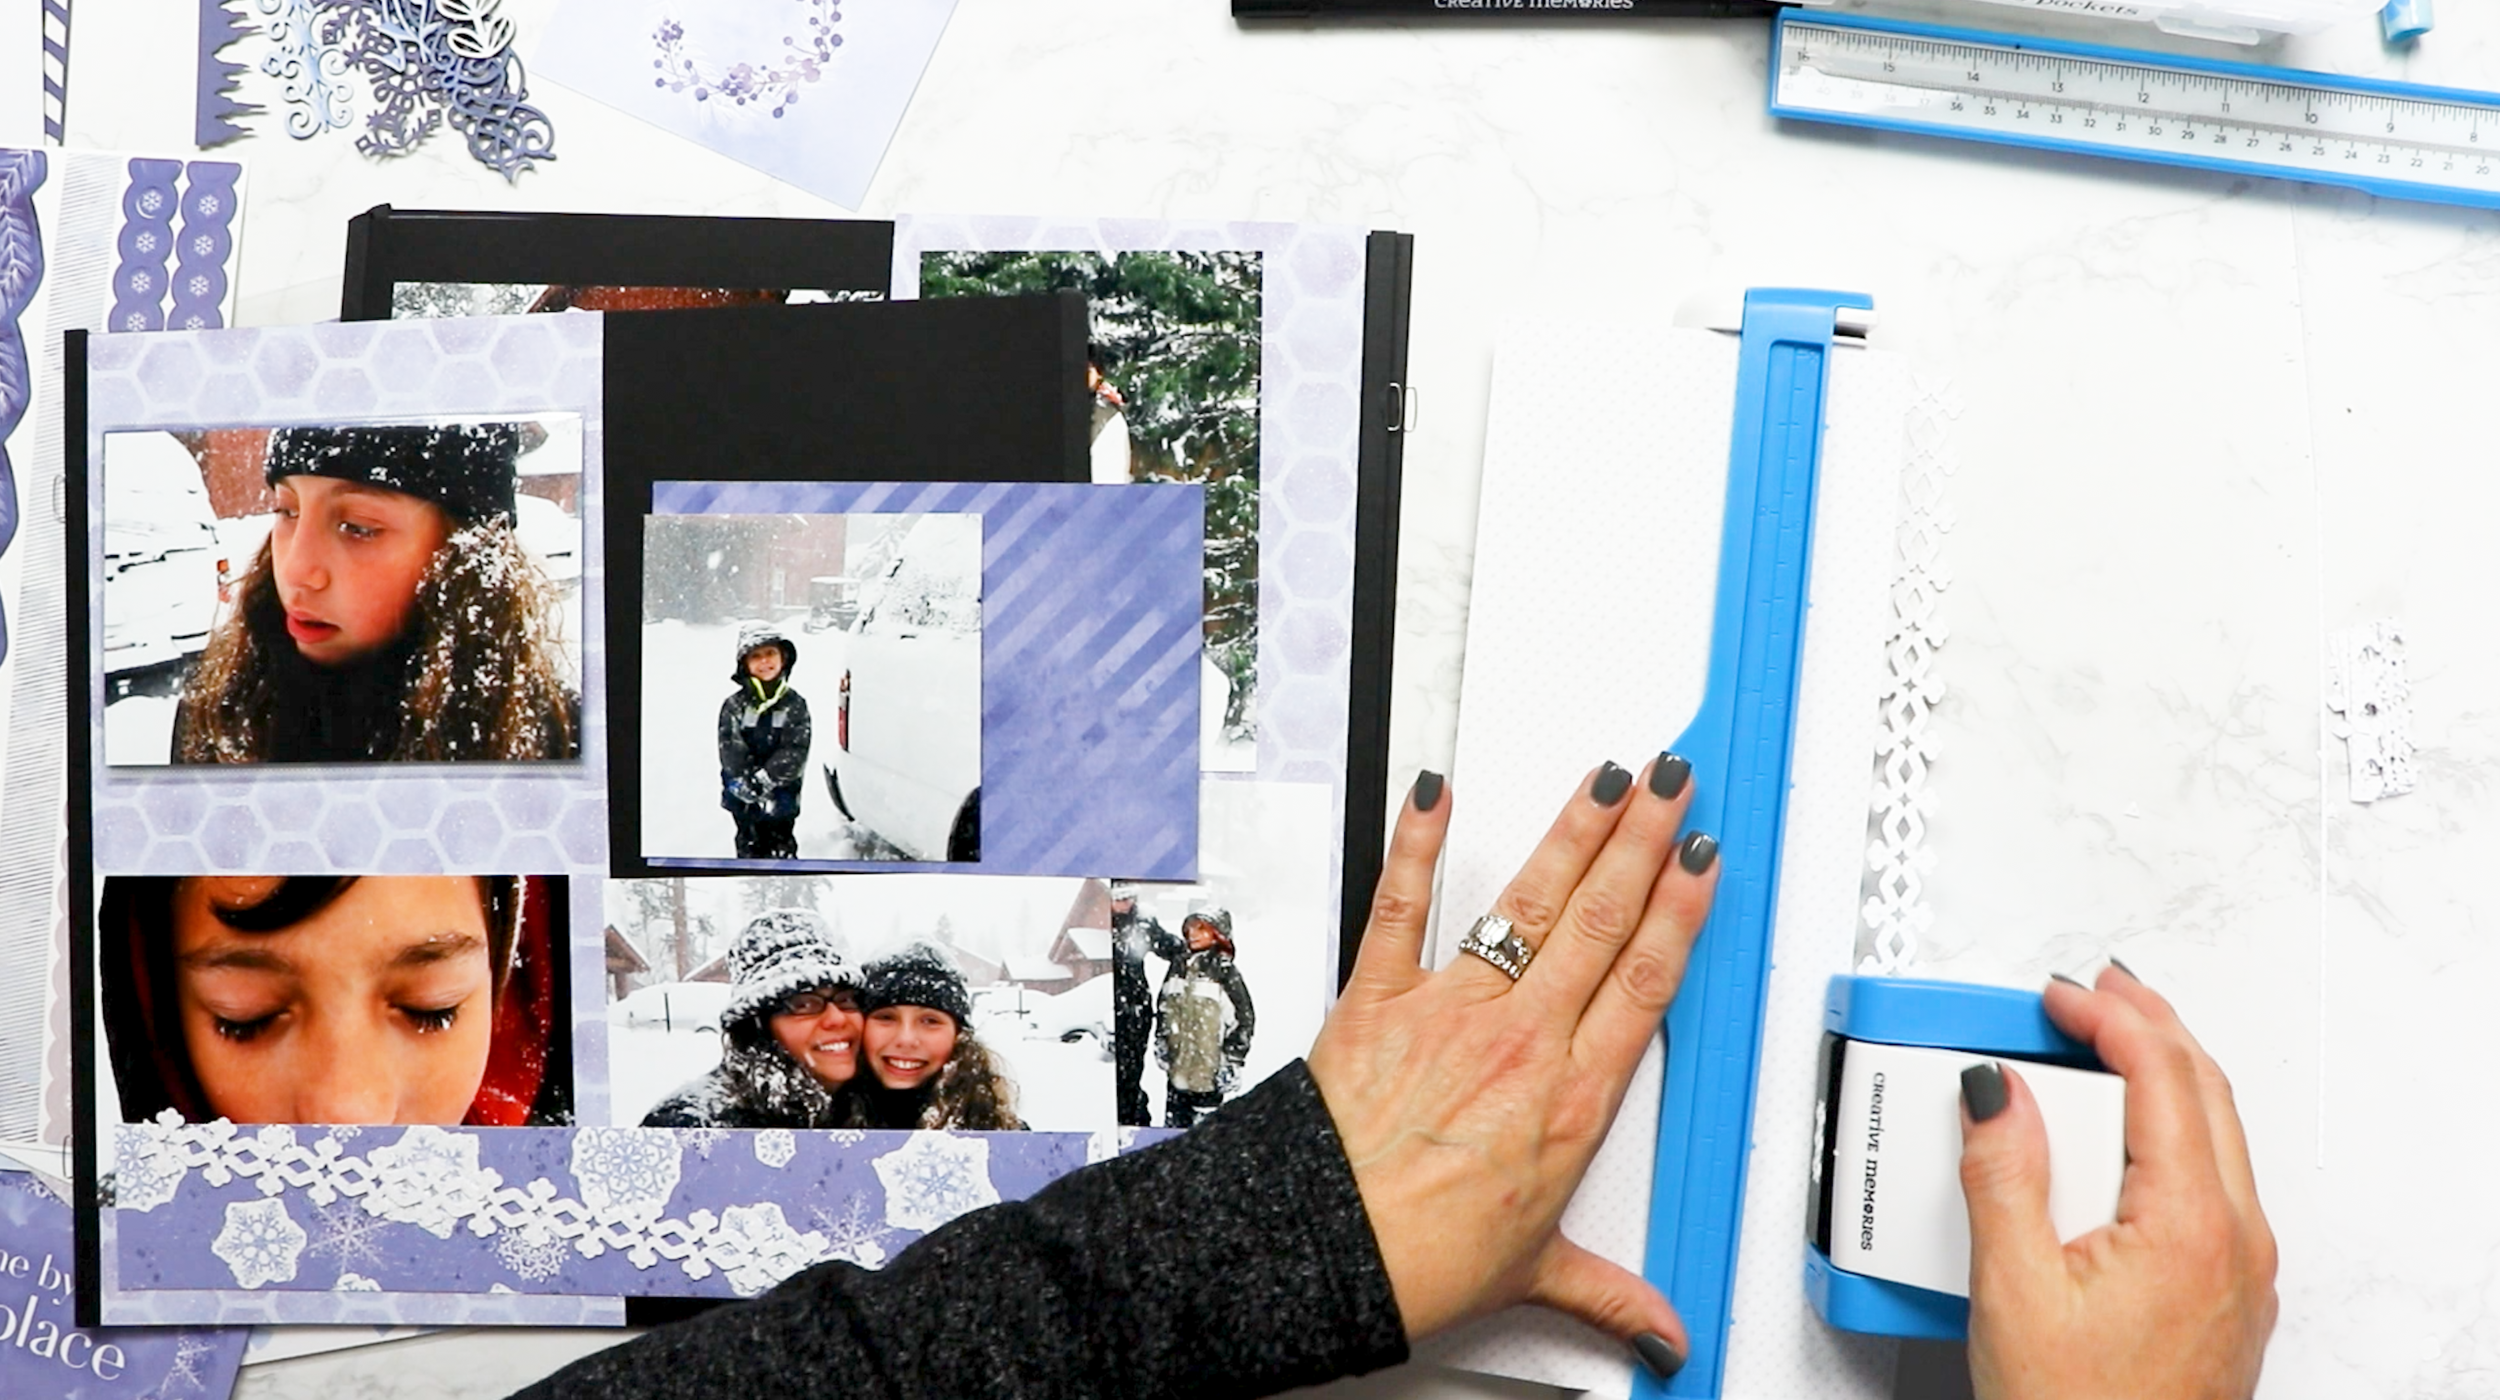
For this layout, I cut two 2”x12” strips of a complimentary paper to begin building a layered strip to go horizontally across the bottom of the two pages. Next I cut two 1”x12” strips and punched two strips of paper with the crystal chain border maker cartridge. I adhered the punched borders to the 1” strips with the repositionable adhesive, then layered this strip on the 2” strip. Leaving a 1/2” reveal from the bottom of the scrapbook page, I adhered the strips horizontally across both pages.

Tip #2: Snap to Grid
This tip takes all the guesswork out of where to put your photos on your pages. No sketches or layout designs needed, just think of your pages as having a grid on them—and then line up your photos, journal boxes, and memorabilia according to that grid. Leave some small spaces (called eyelines) to define your grid, and YES - your layout can be done THAT simply!

For this layout, I left many of the photos in their 4x6 size, then trimmed the additional photos to 4x5 and 4x4. I added a mat behind the 4x4 photo, using a coordinating card from the Winterberry variety mat pack.
If you need to fit in a few additional photos, the Creative Memories Peekaboo Pockets are perfect! I love adding them to the edge of my pages so I can include more photos or journalling boxes.

The pockets come with a flap that has a clear adhesive strip on it, and the adhesive is repositionable, so you don’t have to worry if you change your mind where to put it! It’s really fun to flip out those photos and “peek” at what is under them.
Tip #3: Embellish with Purpose
When it is time to add that special touch, remember my pointers.
Stickers and accents like to have a “home” and be grounded on your page.
Grouping and dimension creates impact, and a place for your eye to rest and notice. This helps define what is important (like your journalling or story), draw attention to a certain spot on your page, or tell your eye where to go next.
Clustering in groups of odd numbers is usually more appealing.

On this layout I used 3 snowflake stickers around the journal box, and used foam squares to add dimension to two of the stickers. I also grouped 3 of the washi tape stickers with the word stickers layered on top, and used the foam square to highlight and add dimension to the middle sticker. I added a few extra stickers to highlight the peekaboo pocket and smaller photo.

These same tips can be used over and over in different combinations to create simple yet beautiful pages. By varying the size of the color blocks you use, the designs of the borders, stickers and layered strips, and the type and style of embellishments, you can create endless design possibilities! So are you ready? Let’s make some pages!!!