
Welcome to my Vision Scrapbook Workshop!
I am so glad you have decided to invest in YOURSELF and create a beautiful reminder of what you are capable of.
To start off, let’s talk a little about VISION to get you thinking about what you want to add to your album.
VISION is the ability to think about or plan the future with imagination and wisdom. I think the key word here is imagination. And that is specifically what our vision albums can do for us! Help us imagine what is possible.
So before we jump in to all the details of how to put our album together, I just want you to know you set your own pace, and you can go as intensely into each area as you choose. Think of writing your vision, affirmations and goals as a layered process. You may not get it all out at once, but you can come back, think, and always make this into something that works for you, and most importantly, something that inspires you and sparks your imagination!
This album should be something you pick up daily, look through, think about and enjoy. Put it on your bedside table and look at it in the morning when you wake up and in the evening when you go to sleep. Read it. Feel it. Absorb it.
Let your mind take in each piece of your vision, affirmations and goals. Look though the photos that you have selected, and begin to experience the feeling and clarity of having these things in your life!
Then guess what — magic can start to happen! Your brain will go to work to start inspiring you to move toward these goals - and all you need to do is listen and be ready! Trust yourself, and then you will find a way to make what is in your beautiful little book a reality.
So are you ready to get creating?
Welcome & Supplies list Video
So let’s get started with the supplies list. As always, you can substitute products and tools, but this is a list of what I will be using during the workshop:
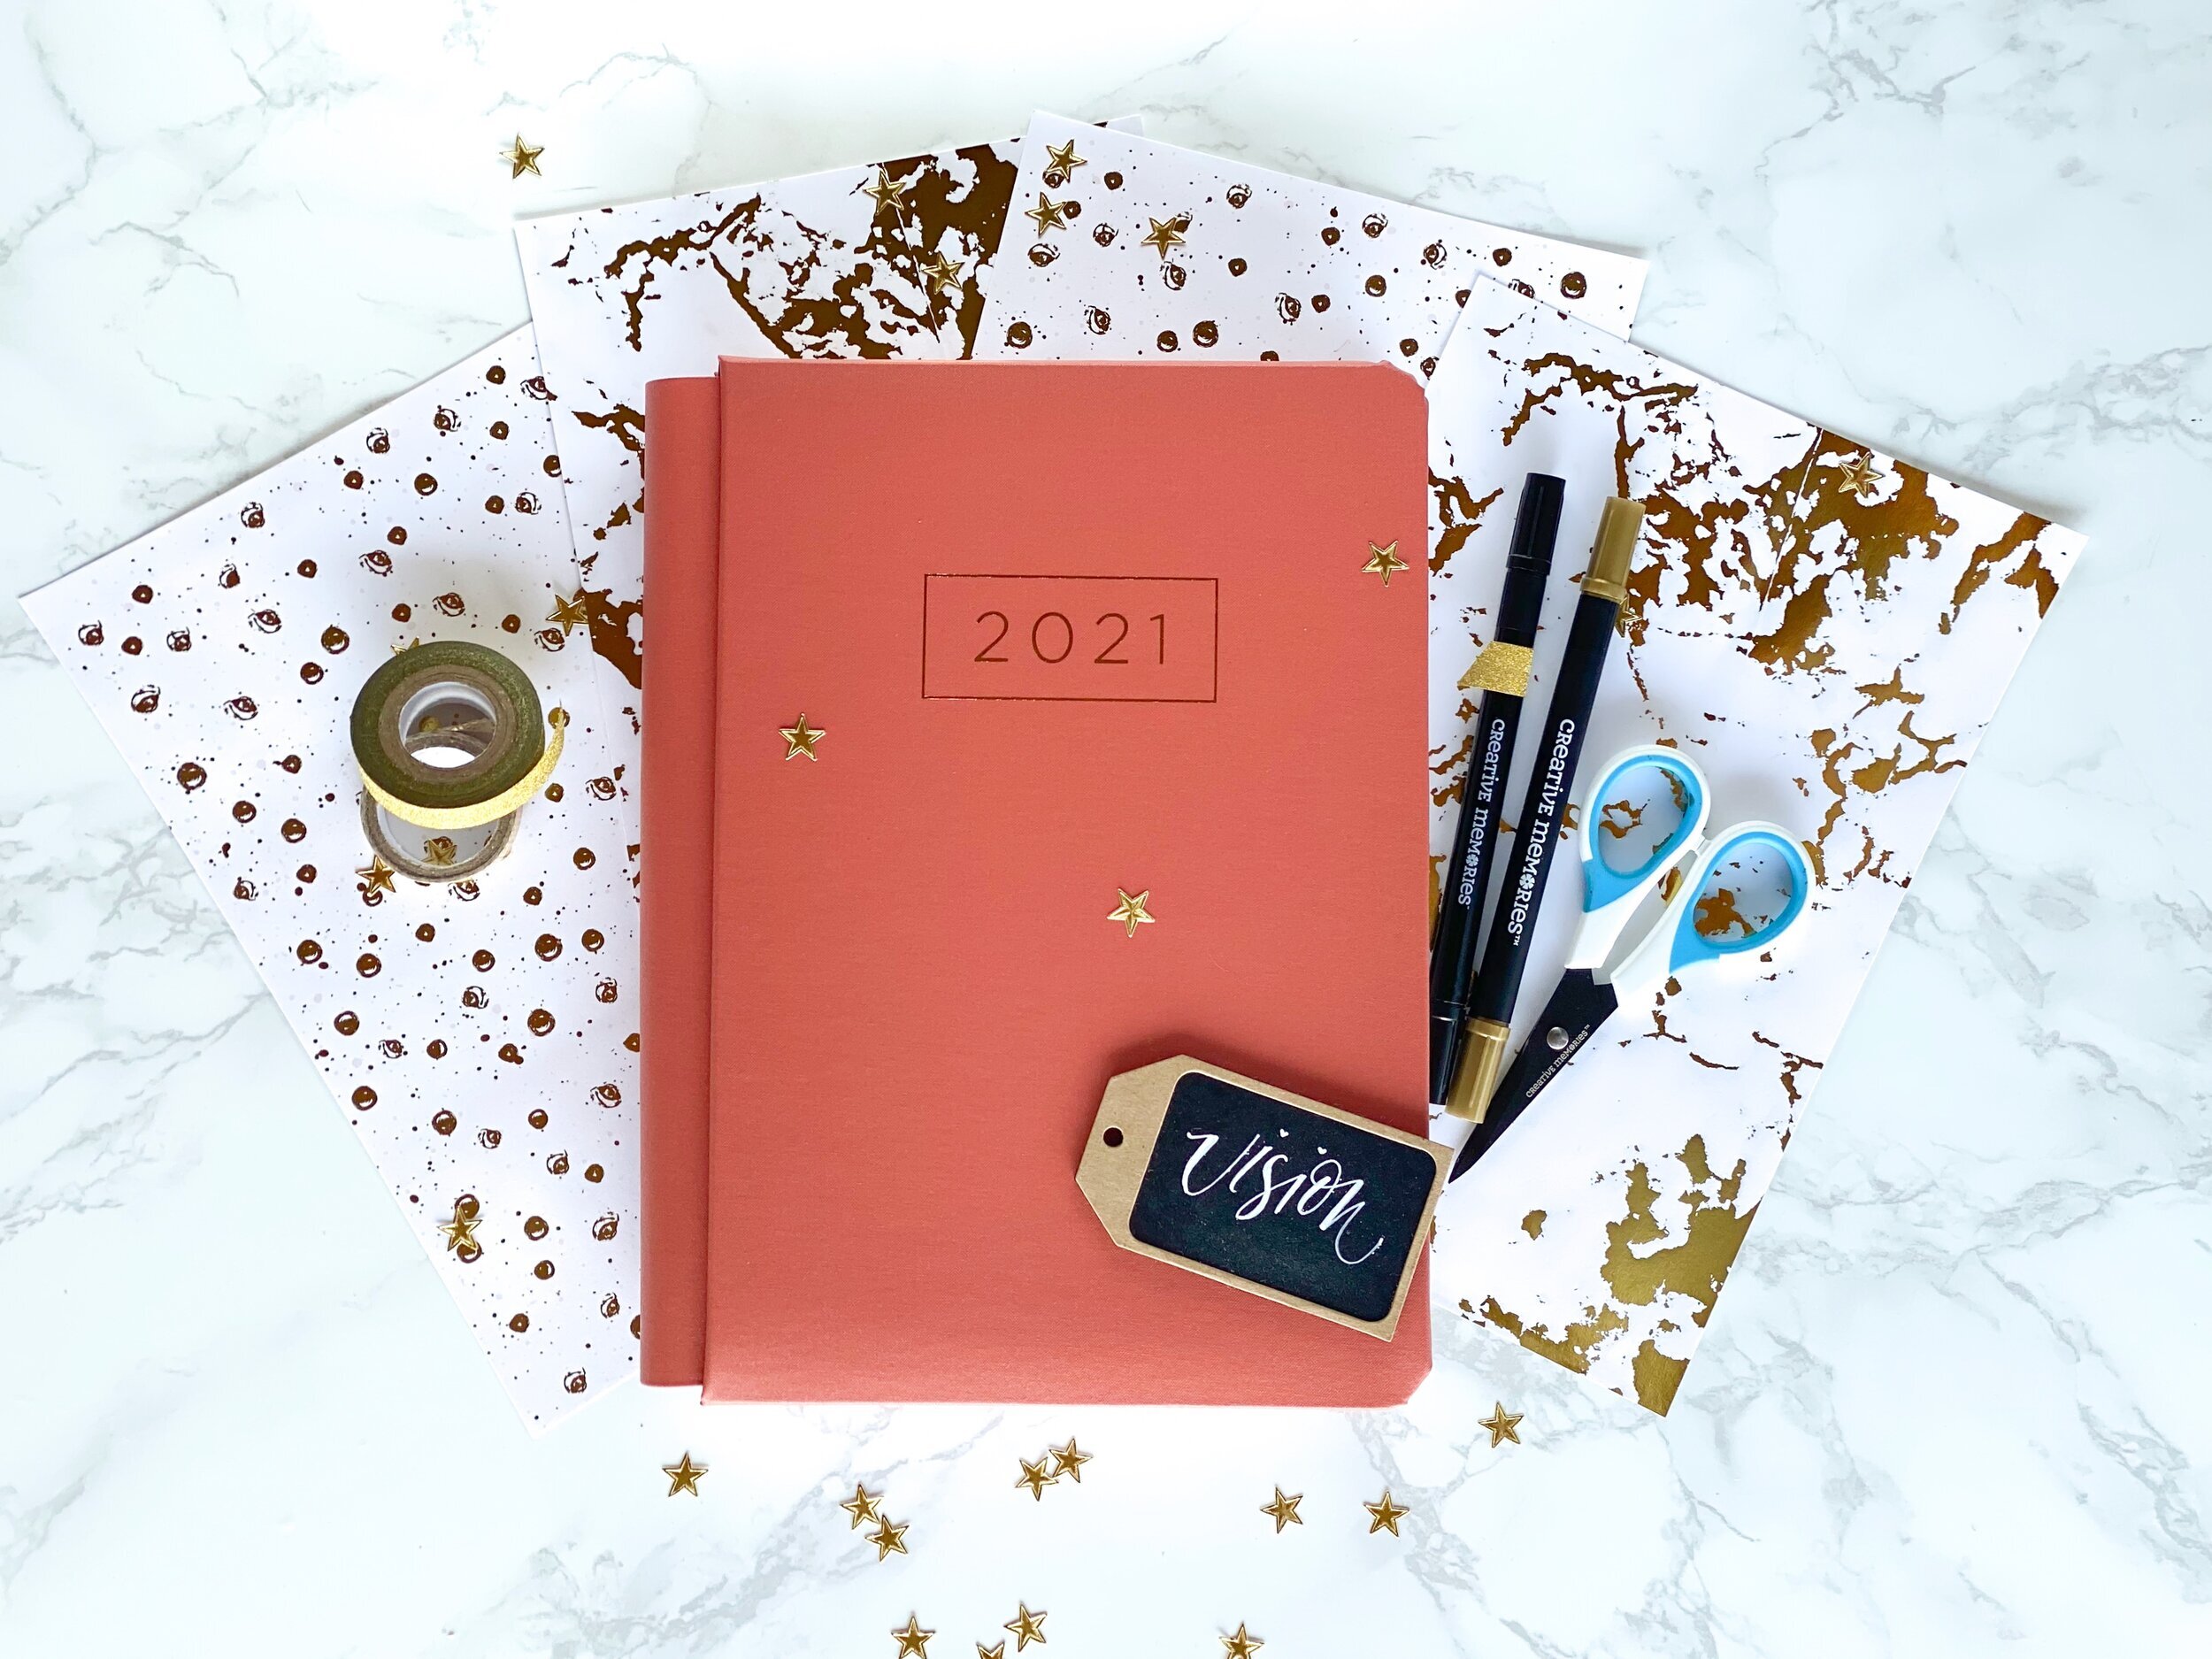
Creative Memories Happy Album
Happy album white refill pages (2 sets)
3 packs of 4x6 peek-a-boo pockets (these can be optional as well)
Happy album kit #4 (2 packs)
3 shades of your favorite color of 12x12 Cardstock, 3 sheets of each
ABC letters in black and white
Adhesive (repositionable is suggested)
Black dual-tip pen
Punches, borders, stickers and embellishments of your choice!
Happy Album paper pack (2 packs) OR you can use the printable downloads I have provided in this class!
PRINTING AND CUTTING GUIDE:
If you are using the designs I have created for this class (which I suggest) please print the following quantities on 8.5”x11” (or similar) white cardstock (using the borderless print feature if possible):
Dot Swirl Paper: 3 sheets
Star Paper: 3 sheets
Dot Burst Paper: 3 sheets (plus 1 additional sheet if you want to print your quote on this design)
Grid Paper: 2 sheets
Dot Grid: 9 sheets (OR you can also use the white ruled paper by CM)

And if you would like to join me in having this quote as a reminder when you open your album, you can write out the quote, or download this one I made for you. When you are ready to print, make sure you size the print to work where you want to put it. I sized the one I have in my book to print at a 5” x 6” size.
Once you have these papers printed, grab your 9 sheets of colored 12x12 cardstock and 2 packs of Happy Album Kit #4 and follow along as we do our cutting.
Step-By-Step Cutting Instruction Video
Now that we have all our pieces cut and ready,
Let’s build our book!
TITLE PAGE & WORD OF THE YEAR
We will start our album with a title page. This is where you can put your favorite quote, or use the one I created for you.
You will also create a pocket and tag that has your word of the year (WOTY).
Your word should be something that you want to be reminded of, what you want to focus on, need more of, or perhaps something you want to improve. Your word should help you bring clarity and focus to your life! This may be a little tricky, so to get started, pick three words that seem to be a good fit for you.
You can check out this list of words to help you get some ideas:
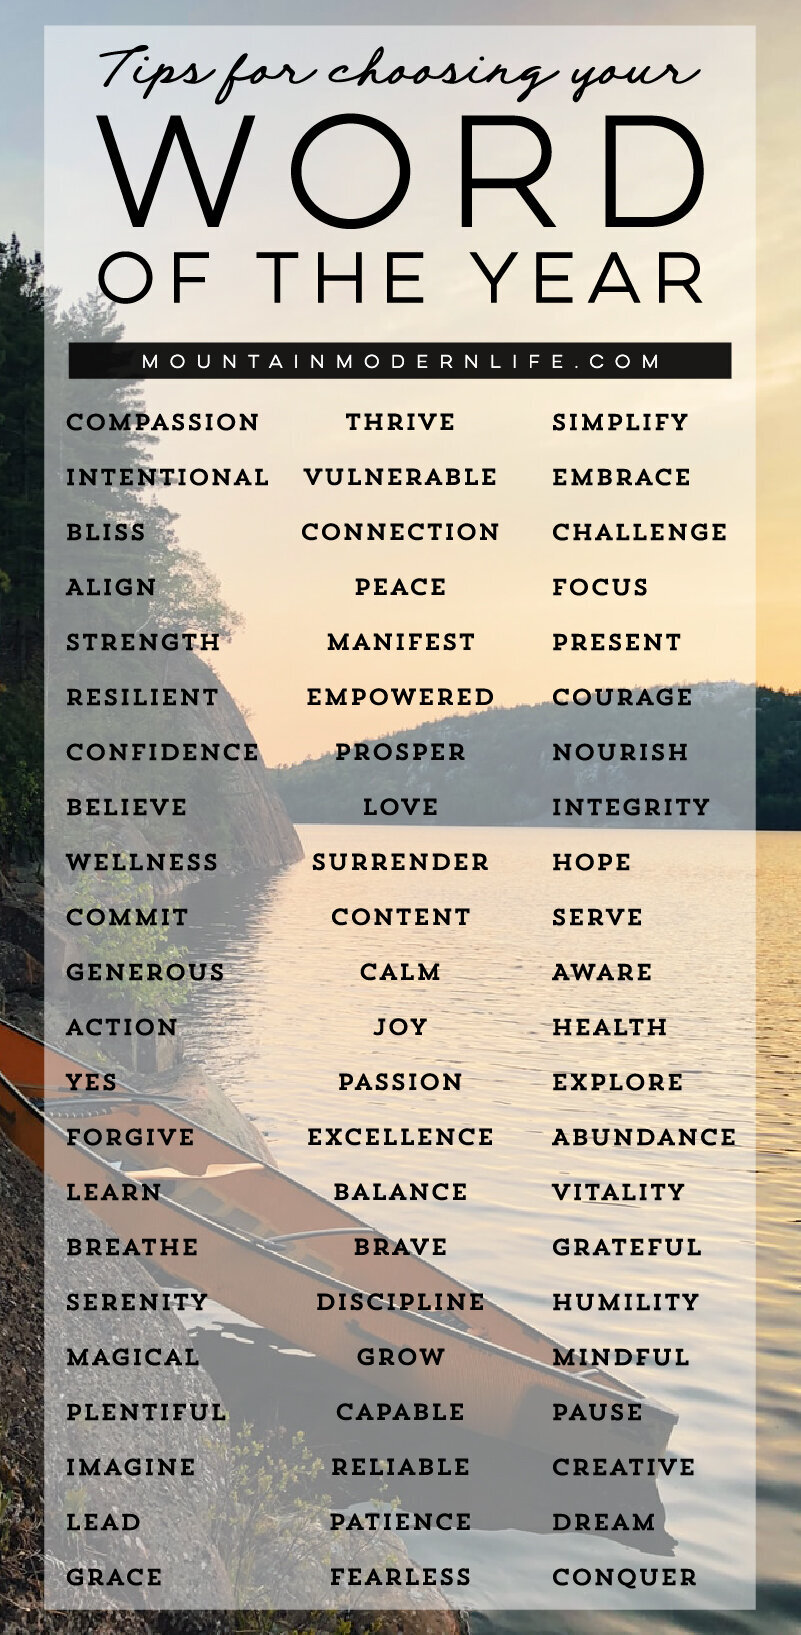
Once you have your three words, ask this simple question: are you interested in the word, or are you committed to the word? Hopefully, if you feel that little flutter or twinge and say “committed," then you know you have the right word for you!
Add that word to a pocket on your front page, so that you can be reminded each time you open your vision book.
Step-by-step title page and Word of the Year video
SETTING UP OUR VISION AREAS:
Now we will jump into the heart of our album, and begin with the 9 quadrants for your vision: Feel free to adjust the words/quadrants to work for you! To get started, print out this chart and then jot down your first ideas of what you would like to see happen in each of these areas of your life.
Wealth/Financial
Relationship/Family/Friends
Spiritual/Learning/intellect
Service/social
Health/wellness/physical
Love/emotional
Career/work
Hobbies/relaxation
Dreams/Fulfillment
Each quadrant will have two, 2-page spreads dedicated to it. The first 2 pages will be for a title, affirmation and goals. The second 2 pages will be for inspirational photos of what each vision looks like for you.
The setup for this album will go quickly and easily, and you can have as much fun as you like making this feel good and look good to you.
Let’s get started with the set-up and planning for all of your pages. As we are working, keep thinking about your 9 quadrants. If you get inspired, or have an idea, pause the video and write it down on your chart.
Step-By-Step page set-up video
Now that the basics are done, we want to get each of the vision quadrants set up with titles and headers for the pages. You can follow along as I show you how I created my titles, or find a fun way to to this for your book!
Creating title sections Video
AFFIRMATIONS & GOALS
Along with all the fun of the crafty parts, you also get to jump in to what will make this album truly spectacular. Your thoughts, your vision, your affirmations, and your goals. This little album will give life to it all.
So to help with this part, I want to remind you of HOW to write affirmations and goals. As with all of these topics, if you want to learn more, there are a number of leading experts that can guide you and give you much more detail. For now, I will give you the basics!
Affirmations:
You might first want to ask, what are affirmations? There are many answers to that question, and I like to think affirmations are goals, stated simply and as if they have already happened.
The way I want to use affirmations for our album is in relation to the 9 areas of your life vision. And once again, this is a start. You may want to create and add more affirmations but to begin I want to keep the focus on one general affirmation for each area.
Many of the leading experts agree there are specific guidelines for writing effective affirmations. This list comes from Jack Canfield and these principles have been around for years:
Start with the words “I am.” These are the two most powerful words in the English language.
Use the present tense.
State it in the positive. Affirm what you want, not what you don’t want.
Keep it brief.
Make it specific.
Include an action word ending with –ing.
Include at least one dynamic emotion or feeling word.
Make affirmations for yourself, not others.
Here are some great words you can use while writing your affirmations:

So your affirmation will be the guiding statement for each area for your vision. Write out and add this statement under your vision header. Have fun decorating this journal box to make it stand out for you.
Next we will move on to more specifics, Goals.
For each affirmation and vision area, you can create a short-term goal, a mid-term and a long-term goal. You can also think of this as an easy goal, a goal that requires a bit of stretching, and a “reach” goal.
Like affirmations, goals are more effective when you follow these guidelines for making “smart” goals:
S: specific
M: measurable
A: action-oriented
R: realistic
T: timely
These three goals will be the indicators to let you know if you are on track with your affirmation and vision. This will hopefully be where you see movement, and can track your progress. Once you are happy with each of your goals, slip them into a peek-a-boo pocket (optional) and add it to your page.
The bonus will come when you take a snapshot of accomplishing that goal, and slipping in into the pocket to realize your progress!
BRING YOUR VISION TO LIFE
Sometimes we need that extra nudge or “a-ha” to understand where we are going. As a scrapbooker, I am guessing you are somewhat of a visual person, so now we are going to have some fun and add some visual stimulation to our books!
On the next 2 pages, plaster pictures, screenshots, quotes, or whatever reminds you of that part of your life vision coming to be. Look at Google, Pinterest, or wherever you find inspiration and print out those images. When you can start to really “see” your vision you will start to create the path toward your vision. Let the images be a trigger for you, but I also want you to close your eyes and imagine yourself as part of the experience, with all the sights, smells, and feelings it has to offer. Dig in and have fun with this!
Review & Next steps video
REPEAT, READ AND RELISH
Now that you have the basic set-up down, you can repeat this process for each of the 9 areas for your life vision.
I encourage you to take this at your own pace, you may want to get the basics down, and then spend some time with your affirmations, and then follow-up with your goals. Or you may want to do one section at a time. At the back of your book you can customize your thoughts by adding pages to remember your blessings and gratitude, record everyday wins, and document your growth and what you have learned!
Just remember, this album is entirely yours! Add to it, change it, love it. Most importantly, use it. Put it somewhere you will be reminded to read it and look at it at least twice a day. And then let the magic happen.
Blessings and hugs,
