
MASTERING Craft Room Organization - Part 1 / The Big Picture

Craft room organization. Now THAT’s a topic! Let’s face it, most of us want an organized craft space, and a PRETTY craft space. But how? Well, first I think it important to realize organization is not about mouth-dropping custom-built everything, but rather a perspective on how you craft, what you already have to organize, and then what you might need. I have a few easy tips to get you started thinking about your space, as I share mine. You can see a full tour of my craft room right here. I will get into all the juicy details of some of my favorite products and containers, and show how each space is organized as the series continues, but for now, let’s just focus on the big picture.
I know everyone’s situation is unique as to your interests and supplies and space, so I will provide ideas and show products that are duplicatable and easy to try for yourself. Your interests and supply stash may look quite different from mine, but I hope you find insight or inspiration (and a tip or two) as I share what works for me when I organize my space.
make your space pretty!
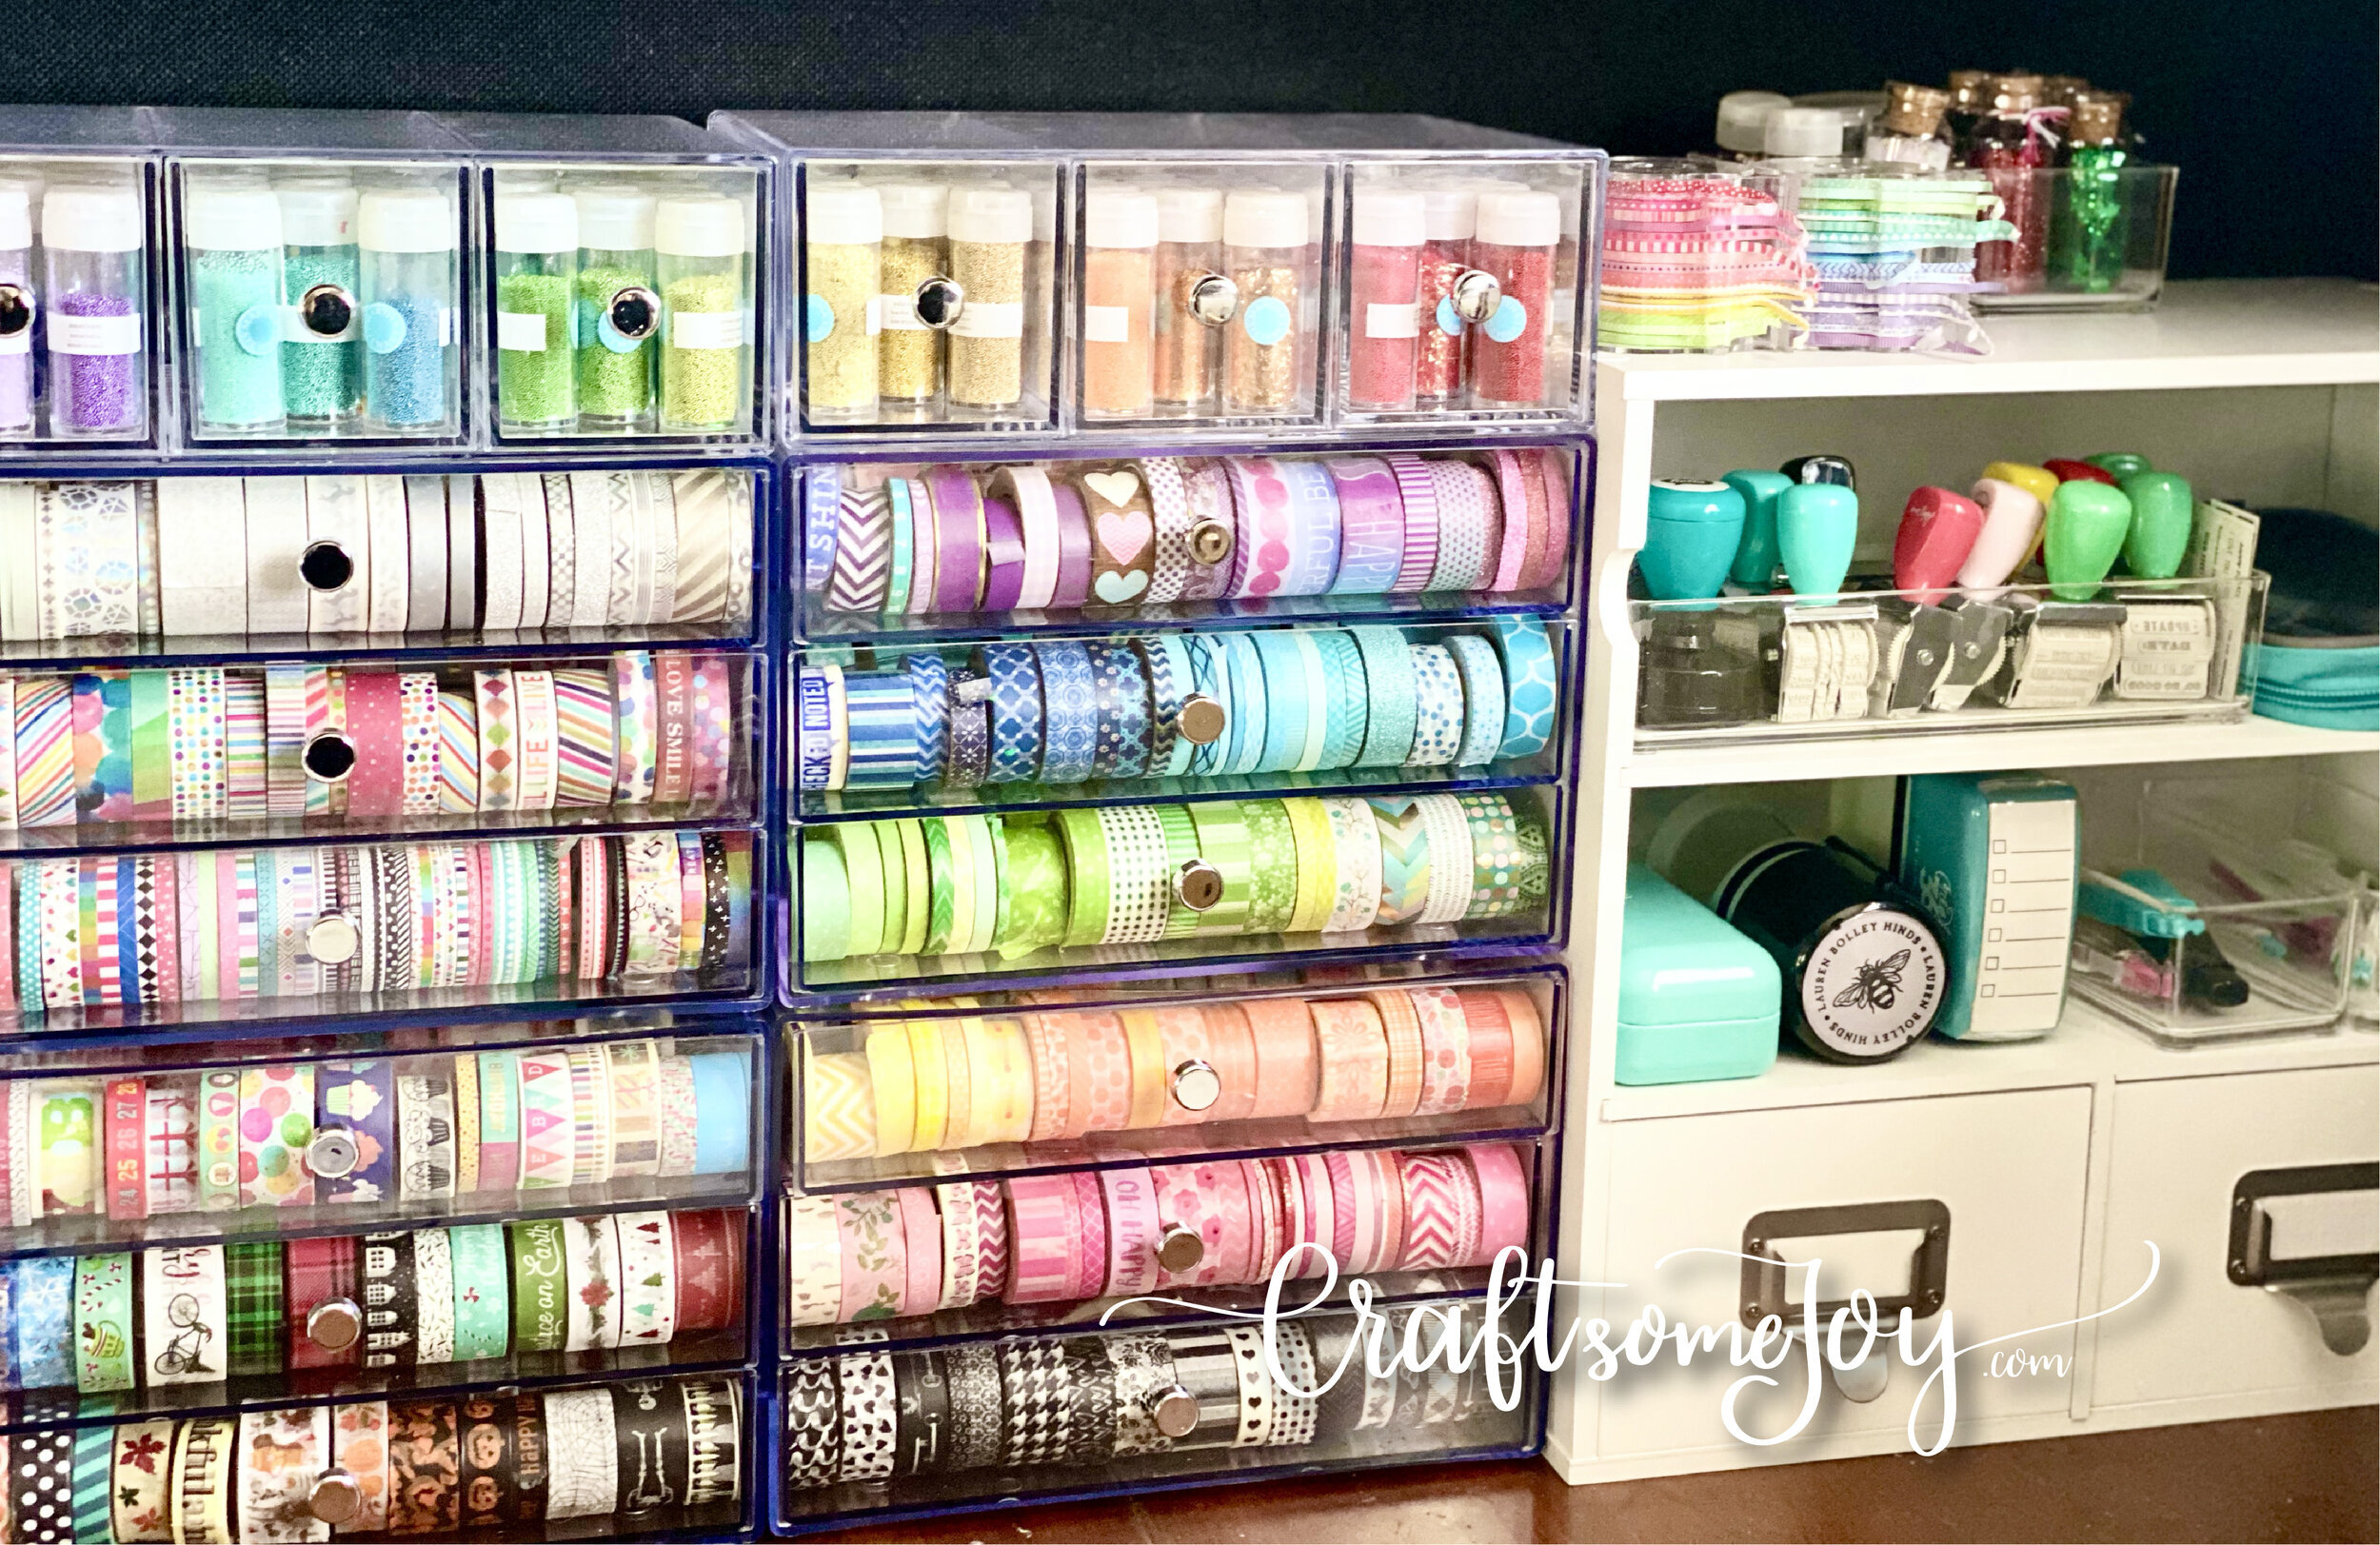
OK, really this has to be first! I love looking at pretty things, and I love color and I love papercrafting. That is just how it is. I am a visual person, so when I surround myself with things that make me happy, my whole mood changes. I get to relax, breathe, and enjoy my craft. This is also where my own style can shine, and where my favorite things come to play. My craft room is a place I call my own, and where I make all the decisions. Artwork, handmade items, keepsakes, special gifts, rainbow craft supplies and black and white patterns - all these fun things have a place in my space.
make creation stations

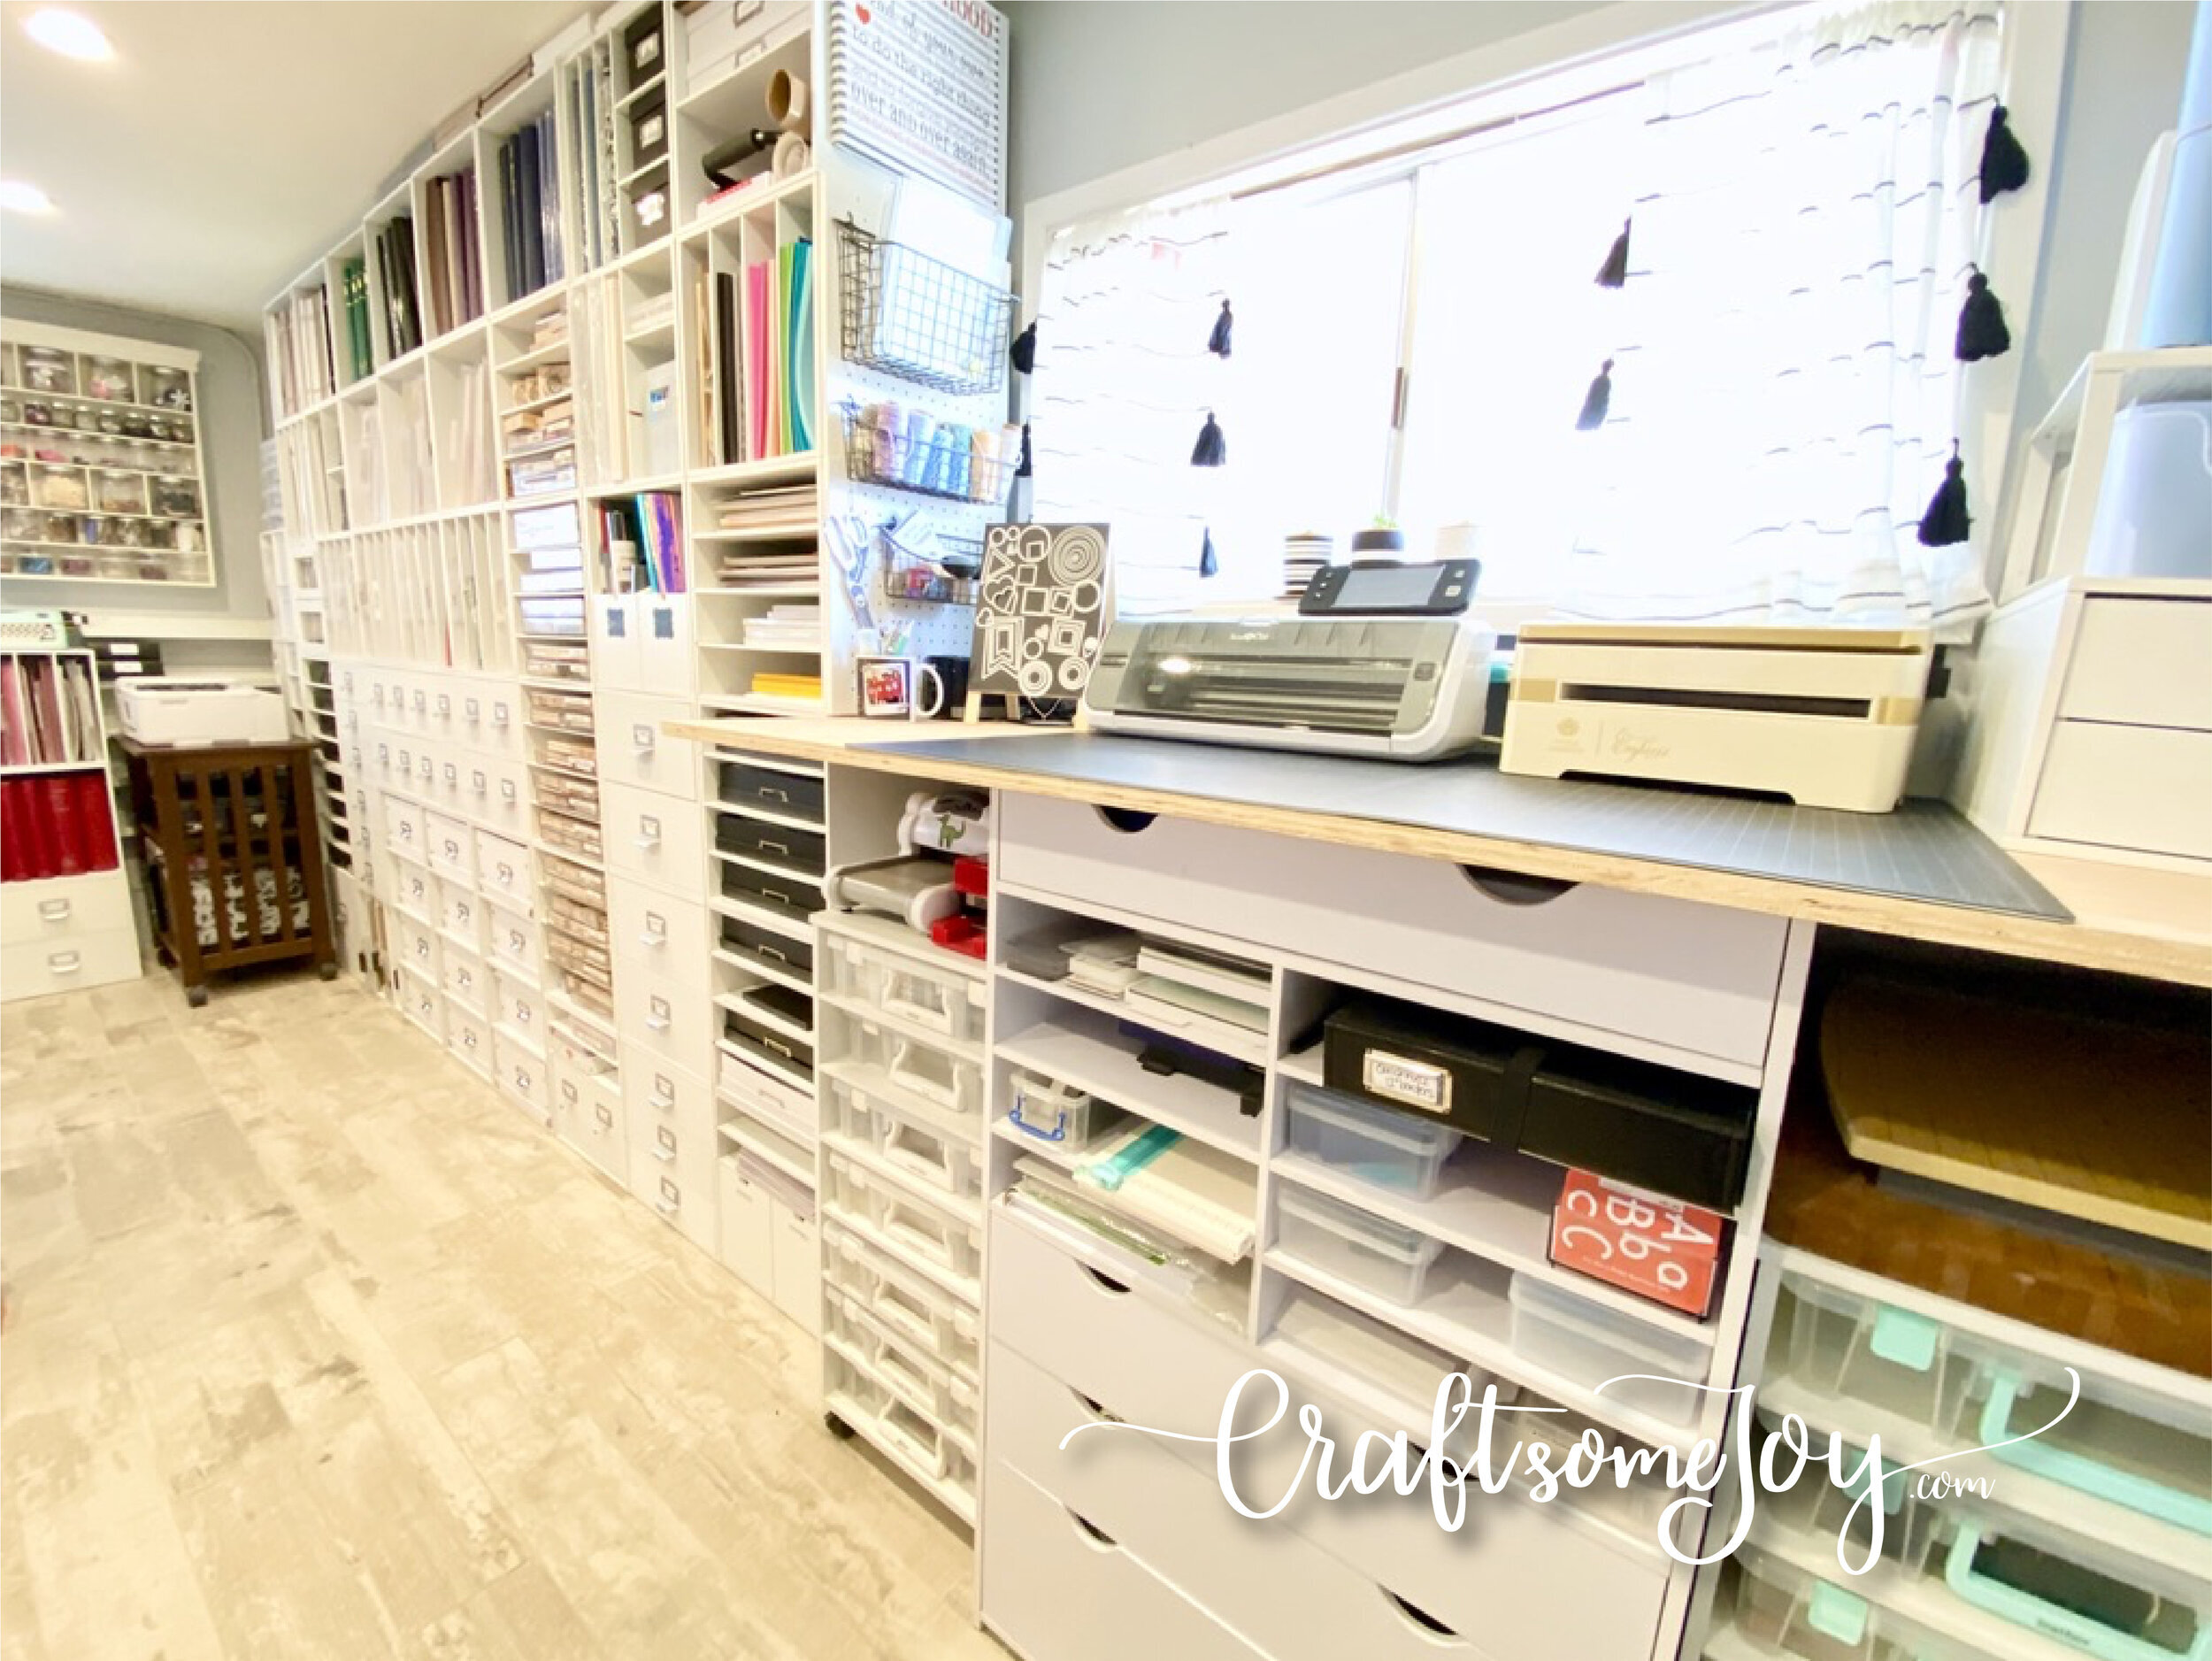
I have areas where I do my different crafts, and where I have grouped all the same supplies together. I love having a cutting station, where I go to use my personal cutting machine, my die cut machine, trimmers, and so on. I have a sewing corner where all my sewing supplies, machine, fabric and patterns are within reach. Adjacent to sewing, I have all my jewelry making supplies, all in cabinets and drawers grouped together. And then I have my wall ‘o’ cubbies, which houses mostly scrapbooking, stamping and paper craft supplies. I have a rolling printing station, which has my favorite photo printer, scanner and photo paper supplies. Lastly, I have my desk, and work/film area. This is where I have my most used supplies, my computer, and all the pretty things I can fit in around me!
group supplies by category

This one is a biggie for being able to find what you need and use what you have. I have some great videos to show more detail that you can watch here. I like to first group by seasons, and this includes holidays. My paper, stickers, die cuts, stamps and paper punches are all grouped this way. Then I group by general category, such as color, palette, topic, design, theme, etc. I try to repeat all these categories, when applicable, in each station. So if I need a snowflake, I know that will be in my “seasonal-winter” section of die cuts, border strips, stamps, paper, or punches, depending on what I am looking for.
enjoy what you have!

So that is the starting point, but I must admit my craft room is far from perfect or complete (my space is a converted basement area, measuring roughly 10’x18’), but it is organized in a way that works for me! I don’t have the budget for a custom built space, so I started by using what I have, organizing, rearranging, and then planning for what I need. I like to think of the best—and sometimes different— ways of using the Michael’s cubes and IKEA drawers that I have, finding the right containers to use, and making simple modifications to make it all work for me.
If you would like to learn more specifics, and see some of my favorite things, check out the rest of this series!